
AK-Jake on mcb, asked if I could record a quick breakdown video of a WGP Ranger a few weeks back. And since I have an abundance of Ranger parts I figured I would assemble one up and then break it down again. And then list it on the site for sale.
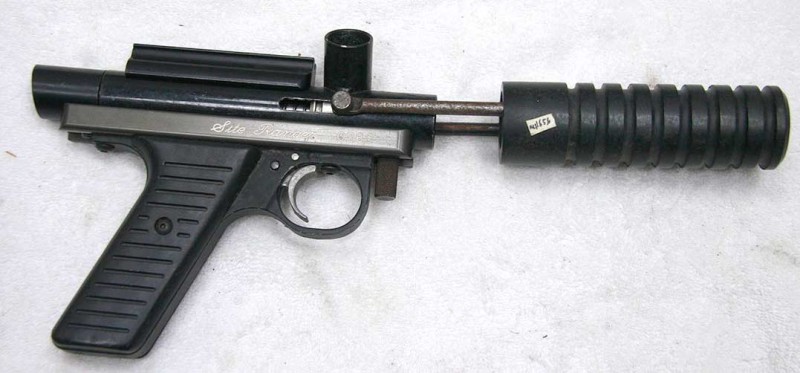
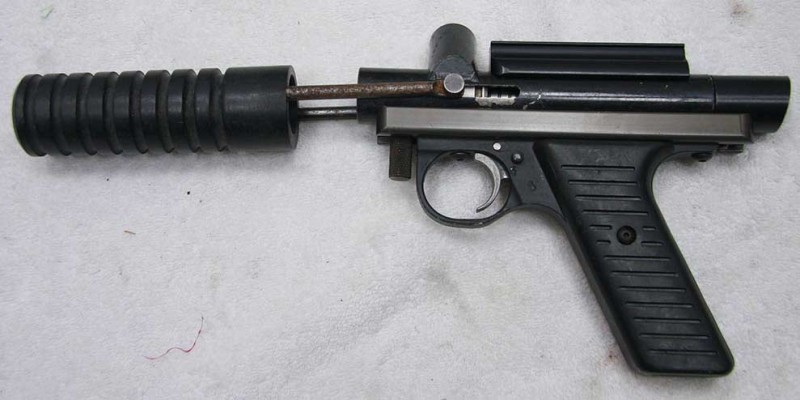
Here is the Site Ranger that I put together out of spare parts from the website and pieces sitting around.
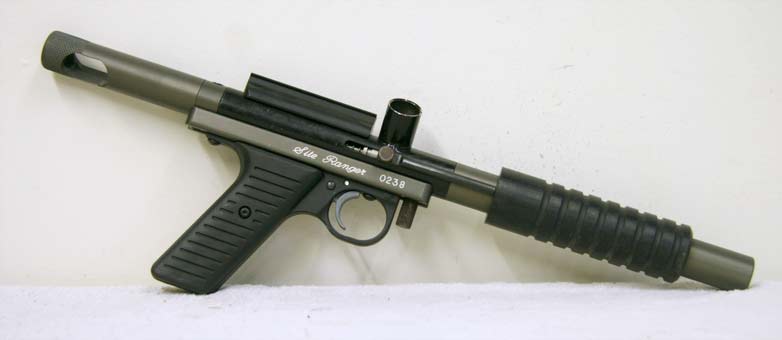
The Site Ranger is mostly identical to the standard Ranger but with a few differences.
•The Bolts are typically non adjustable
•The back bottle constant air valve is replaced by a 12 gram changer.
•The aluminum parts, which include the receiver rail, and the 12 gram changer drop out valve and barrel are all anodized green, possibly hard anodized, instead of black.
The Site Ranger in this article was put together using mostly original WGP parts. The valve assembly, adjustable bolt and STO Autococker barrel obviously wouldn’t be found on a site ranger.

This Ranger is obviously not the nicest example of a Site Ranger available (actually far from) but it can be used to illustrates a break down nicely.
As mentioned, the flat head bolt is not original, and Site Rangers would have come with a non adjustable bolt since they would have been used as rentals.
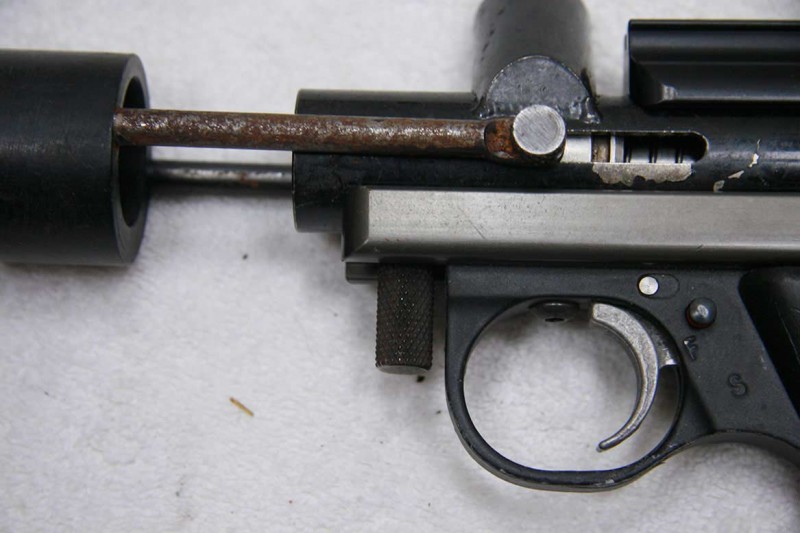
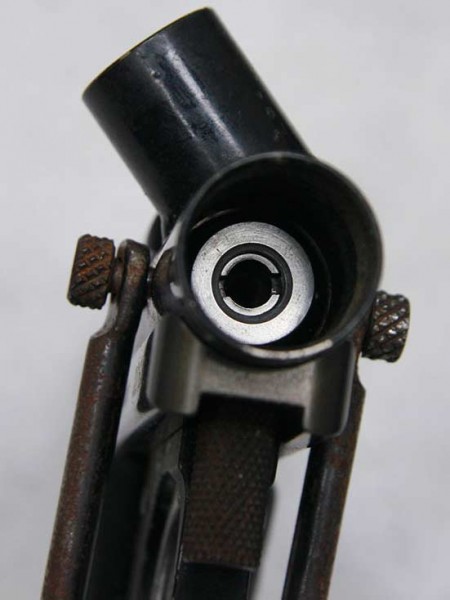
The arms on this Site Ranger are heavily rusted but could cleaned up if someone wanted a project. The front grip frame nut is actually the same piece that was used on the end of the cocking rod on early WGP Snipers and Autocockers.
Instead of the stock Worr Game Products hybrid valve assembly with the seal embedded into the top of the valve retaining screw, I used a stock WGP ranger 10×32 powertube, a nelspot 007 steel valve retaining screw, and a CCI Phantom Cup and seal cup, both drilled out to 10×32. The above video was recorded about 6 months back and shows a similar WGP ranger valve assembly being put together.
In the first video at the top of this article, I disassemble this Ranger, explaining the necessary bevel on the breech side of the barrel, and go over each of the other pieces.
In the second portion I reassemble the parts Site Ranger from the laid out pieces to the complete marker and then test it.
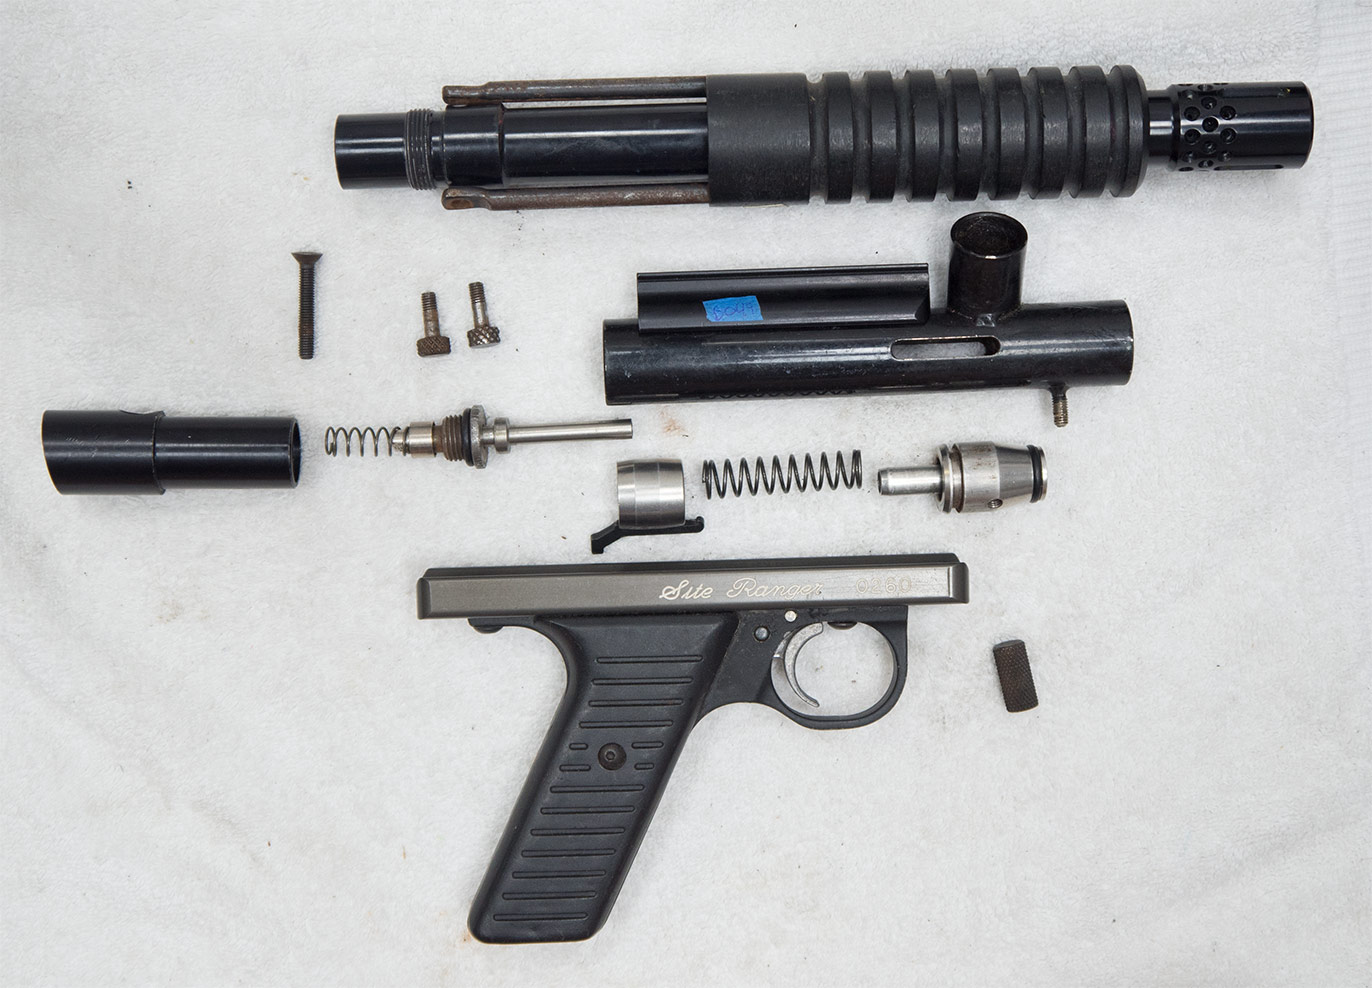
Above is the complete broken down photos.
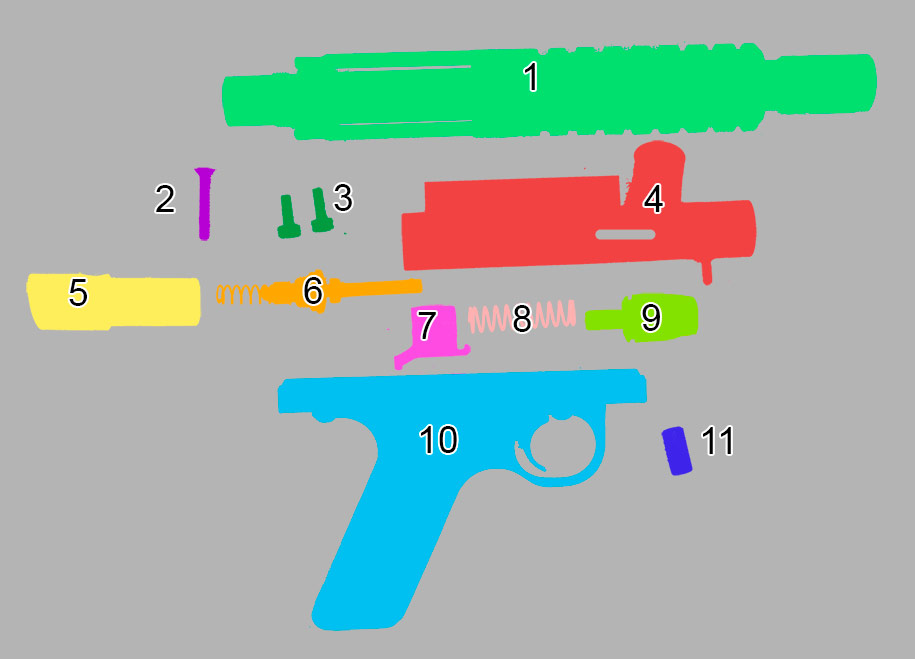
And a numbered photo to name each item.
1. Barrel inside of pump handle
2. Vertical 10×32 screw for back bottle valve assembly
3. Pump arm Screws (10×32 threads)
4. Site Ranger Body with attached Sight Rail
5. Back bottle valve assemble
6. Modified Powertube valve assembly (stock Ranger powertube, Nelspot 007 valve retaining screw, CCI Phantom Cup and seal rilled to fit 10×32 Ranger powertube).
7. WGP Ranger Hammer
8. Main Spring (2 inch Nelson standard spring)
9. WGP Ranger Flat head adjustable Nelson bolt
10. Grip frame and Receiver rail
11. Front grip frame screw (female 10×32 nut, same as back of early Sniper / Autococker cocking rod)
After editing this reassembly video I made a quick 500x speed version for uploading to instagram (and youtube).
And find this Ranger for sale on baccipaintball at:
http://www.baccipaintball.com/b049.html
And Ranger parts for sale at:
http://www.baccipaintball.com/parts/pump/nelson/brand/wgp.html


Thanks for the breakdown, Dan! I never realized how easy these Nelson-based designs are to assemble and disassemble!
[…] Breaking down a Nelson Based WGP Ranger – Old News Paintball History Any help there? __________________ Quote: […]